Basic HTML Version


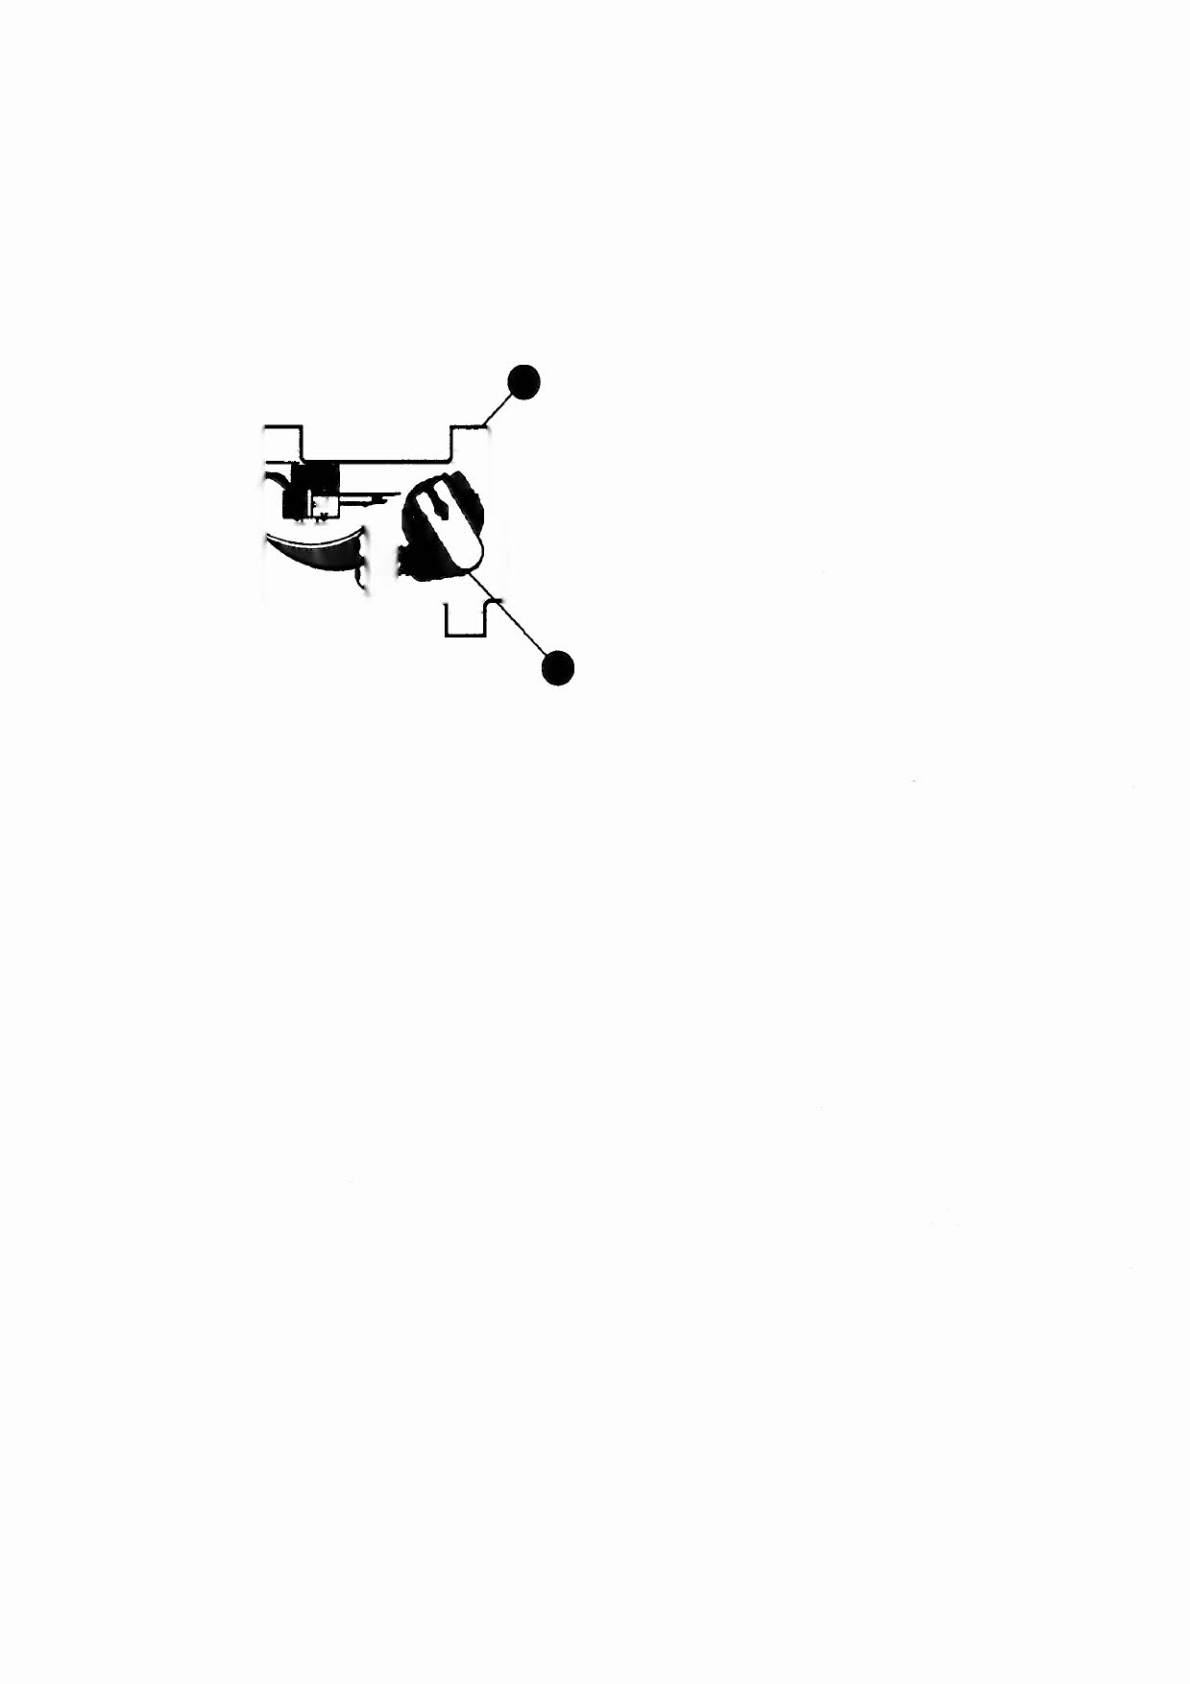
Lower Left Flipper
C-11626-L-3
(Parts listed replace same Items of C-12898)
ITEM PARTNO.
DESCRIPTION
13 B-10655-L
g) B-10657-L
Crank Link Assy. Left
Flipper CrankAssy.
Left
Flipper Crank. Left
Flipper Base Assy. Left
Sh. Metal Screw.
#5 x 5/8
1.) 01-8073-L
18 C-11627-L
20 4105-01019-10
24-26 Not Used
Flipper Paddle
&
Shaft. Yellow 20-9592-6
Flipper Rubber
23-6519-4
Flipper Assembly Notes:
1 Each Flipper Assembly on the Lower Playfield (and the two Lower Flipper
Assemblies on the Upper Playfield) is mounted beneath the playfield. in
conjunction with the plastic Flipper Paddle and Shaft (20-9592-6J and
flipper Rubber (23-6519-4) on the upper side of the playfield.
2 The tip of the EOS Switch must travel 0.0150
(+
.010. - .000) inch. before
the contacts fully open. with the flipper
in
the actu- ated position. The
EOS Switch contacts must have a gap of 0.062
(±
.015) inch.
Adjustment of the EOS Switch must be made at a minimum distance of
0.25 inch from the switch body.
3 Not Used.
4 All moving elements of the assembly must operate freely. with no evidence.
of binding.
5 The large end of the Coil Plunger Spring (item 12) must fit within the four
lugs of the Solenoid Bracket.
6 For coil replacement. remove the Solenoid Bracket (item 11) to prevent
screw damage.
7 Use Loctlte'
242 when reattaching screws to the Flipper Stop Assembly.
the Solenoid Bracket. and the Flipper Bushing.
8 When replacing the Bumper Plug (item 14) to restore proper flipper
operation. readjust the flipper paddle and shaft position.
9 Solid color blue wire connects to the banded end of each diode, mounted
on the connector end of the Flipper Coil (item 9). Trace color wire
connects to the unbanded end of the diode.
Lower Left Flipper 2-17