Basic HTML Version


A-19223-R
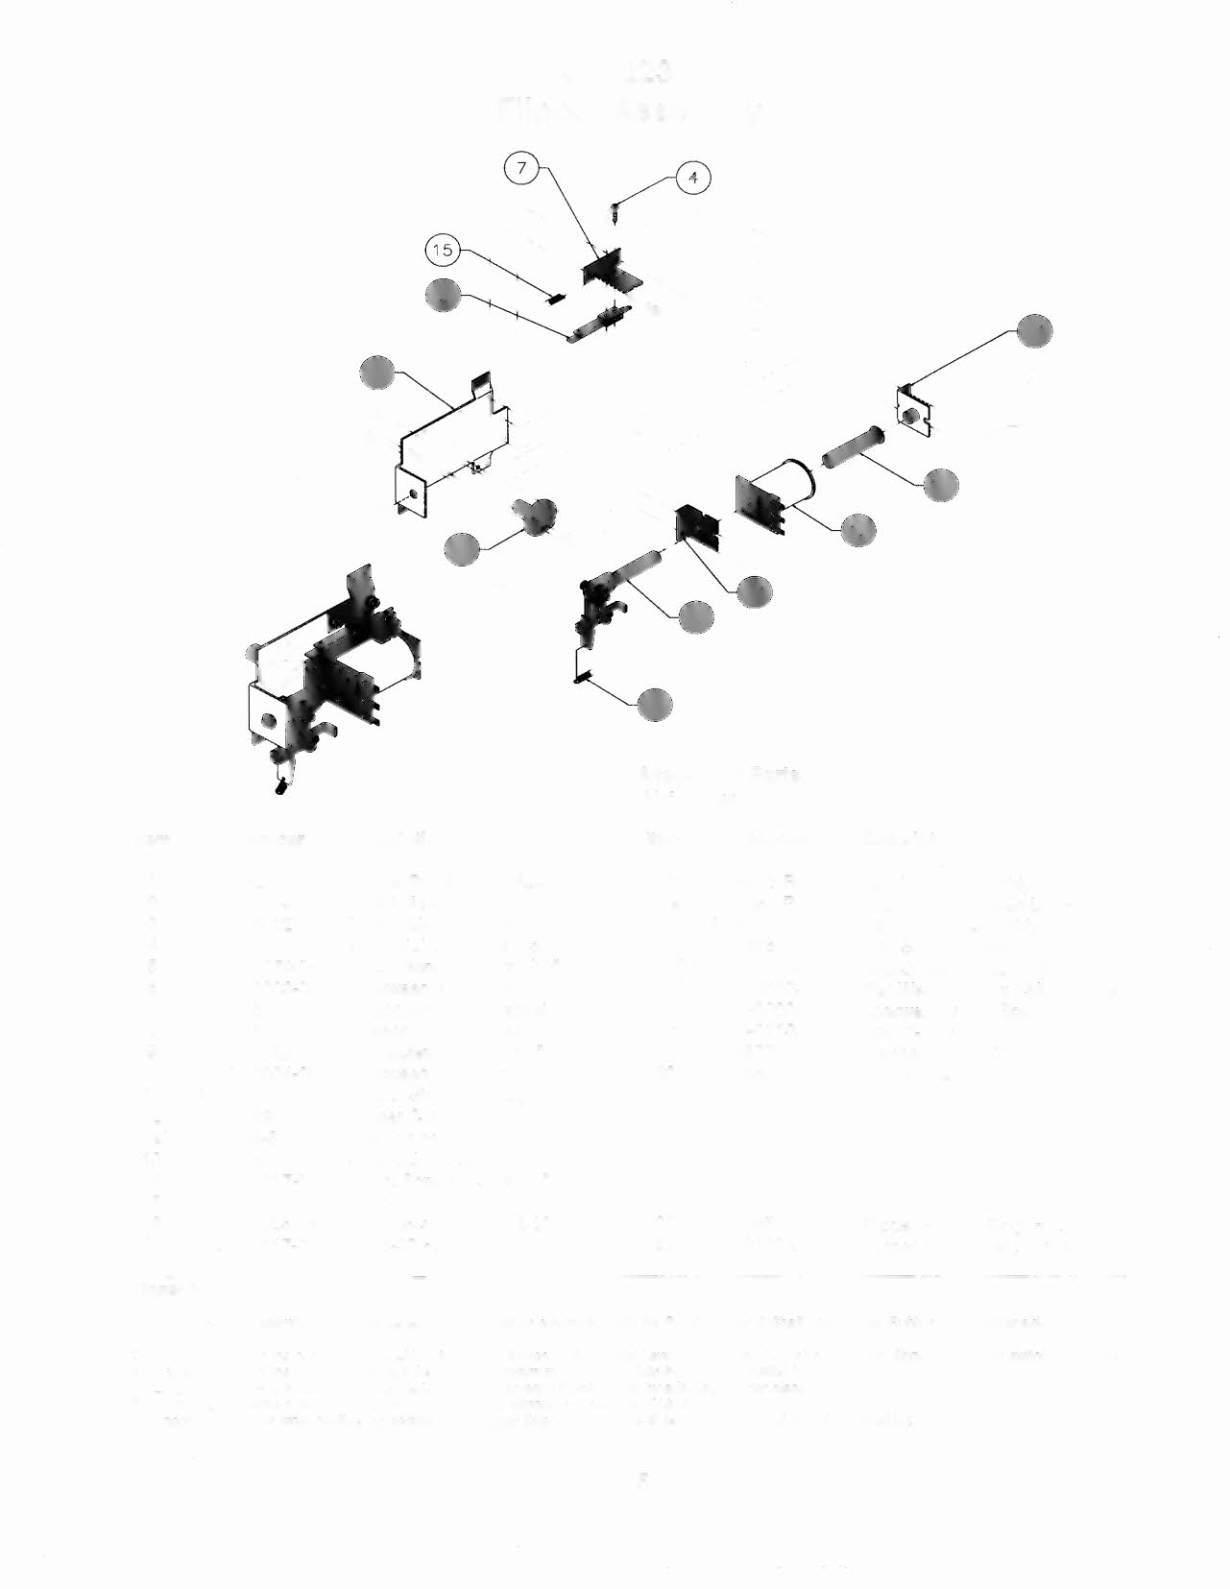
Flipper Assembly
Item Part Number
1 A-19262
2 SW-1A-194
3 4701-00002-00
4 4105-01019-10
5 4008-01079-05
6 4701-00003-00
7 01-9375
8 20-6516
9 4010-01066-06
10 4701-00004-00
11 A-12390
12 FL-11629
a) 03-7066-5
13 01-7695-1
14 4006-01017-04
15 10-364
16 4006-01005-06
17 4406-01117-00
Description
Flipper Bracket Sub-Assembly
Switch Assembly
Lockwasher #6 Split
Sh. Metal Screw, #5 x 5/8"
Mach. Screw, 8-32 x 5/16"
Lockwasher #8 Split
Switch Mounting Bracket
Speednut, Tinnerman
Cap Screw, 10-32 x 3/8"
Lockwasher #10 Split
Flipper Stop Assembly
Flipper Coil, Blue
Coil Tubing
Solenoid Bracket
Mach. Screw, 6-32 x 1/4"
Spring
Mach. Screw, 6-32 x 3/8"
Nut 6-32 Hex.
Associated Parts:
(Not Shown)
Item Part Number
18 A-15848-R
a) A-17050-R
b) A-15847
c) 02-4676
d) 4010-01086-14
e) 4700-00023-00
f) 4701-00004-00
g) 4410-01132-00
19 23-6577
20 03-7568
21 23-6695
22 20-10110-5
Description
Crank Link Assembly, Right
Flipper Crank Assembly, Right
Flipper Link Assembly
Link Spacer Bushing
Cap Screw, 10-32 x 7/8"
Flat Washer, 5/8 x 13/64 x 16ga.
Lockwasher #10 Split
Nut 10-32 ESN
Bumper Plug, 5/8"
Flipper Bushing
Flipper Rubber Ring, Red
Flipper Bat w/Shaft, White
Flipper Notes .•.
I.
Each Flipper Assembly is mounted beneath the playfield, in conjunction with the Plastic Flipper
&
Shaft, and Flipper Rubber on the upper side of the
playfield.
2. With the flipper, in the non-activated position, the E.O.S. Switch contacts must have
a
gap of .062 (±.015) inch. When flipper is activated switch must close.
3. Any adjustment of the E.O.S. switch must be made at
a
minimum distance of 0.25 inch from the switch body.
4. Longer blade of E.o.s. switch must be made straight. Gap adjustment is done by adjusting shorter blade.
5. All moving elements of the assembly must operate freely without any evidence of binding.
6. Apply Loctite
rM
245
when reattaching screws to the Flipper Stop Assembly, the Solenoid Bracket, and the Flipper Bushing.
2-15